注意
跳到末尾以下載完整的範例程式碼。
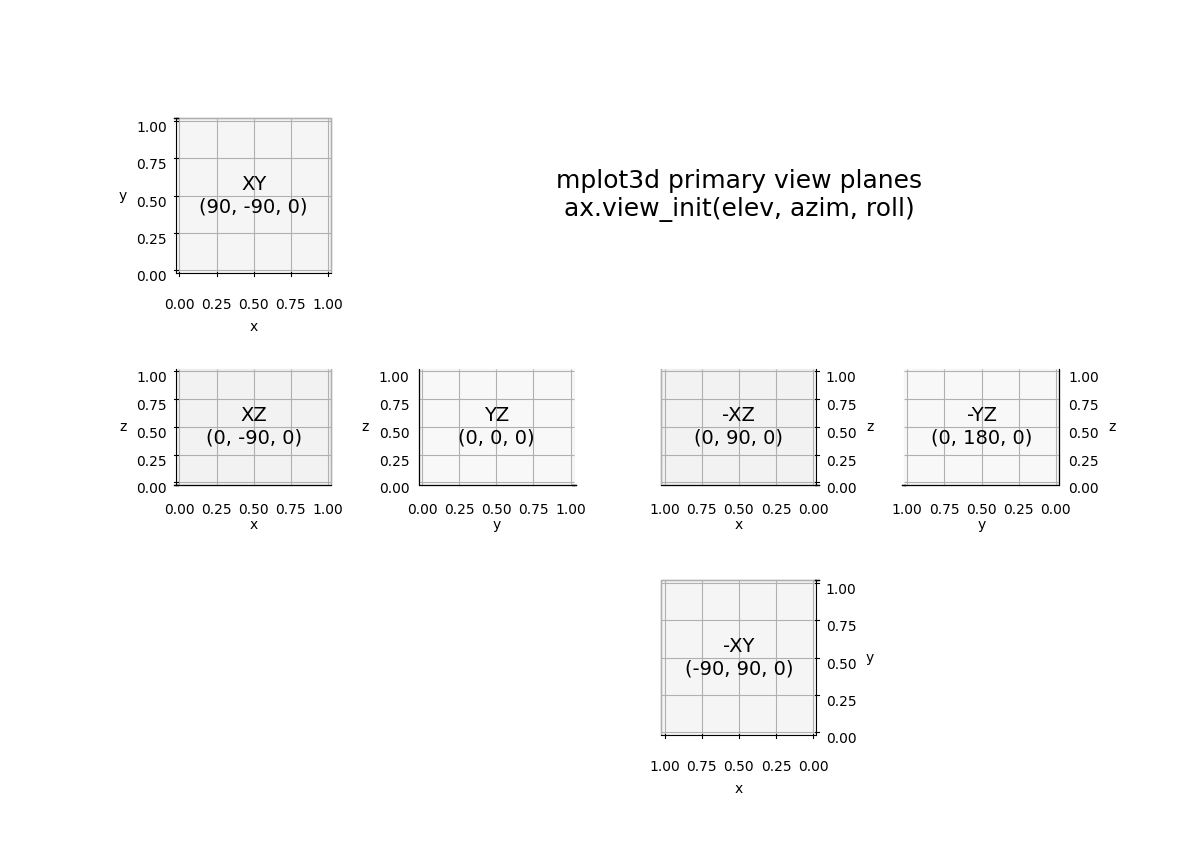
主要 3D 視圖平面#
此範例會產生一個「展開」的 3D 圖,顯示每個主要 3D 視圖平面。每個視圖所需的仰角、方位角和滾動角都會被標示。您可以將此影像列印出來並摺疊成一個盒子,其中每個平面形成盒子的側面。
import matplotlib.pyplot as plt


def annotate_axes(ax, text, fontsize=18):
    ax.text(x=0.5, y=0.5, z=0.5, s=text,
            va="center", ha="center", fontsize=fontsize, color="black")

# (plane, (elev, azim, roll))
views = [('XY',   (90, -90, 0)),
         ('XZ',    (0, -90, 0)),
         ('YZ',    (0,   0, 0)),
         ('-XY', (-90,  90, 0)),
         ('-XZ',   (0,  90, 0)),
         ('-YZ',   (0, 180, 0))]

layout = [['XY',  '.',   'L',   '.'],
          ['XZ', 'YZ', '-XZ', '-YZ'],
          ['.',   '.', '-XY',   '.']]
fig, axd = plt.subplot_mosaic(layout, subplot_kw={'projection': '3d'},
                              figsize=(12, 8.5))
for plane, angles in views:
    axd[plane].set_xlabel('x')
    axd[plane].set_ylabel('y')
    axd[plane].set_zlabel('z')
    axd[plane].set_proj_type('ortho')
    axd[plane].view_init(elev=angles[0], azim=angles[1], roll=angles[2])
    axd[plane].set_box_aspect(None, zoom=1.25)

    label = f'{plane}\n{angles}'
    annotate_axes(axd[plane], label, fontsize=14)

for plane in ('XY', '-XY'):
    axd[plane].set_zticklabels([])
    axd[plane].set_zlabel('')
for plane in ('XZ', '-XZ'):
    axd[plane].set_yticklabels([])
    axd[plane].set_ylabel('')
for plane in ('YZ', '-YZ'):
    axd[plane].set_xticklabels([])
    axd[plane].set_xlabel('')

label = 'mplot3d primary view planes\n' + 'ax.view_init(elev, azim, roll)'
annotate_axes(axd['L'], label, fontsize=18)
axd['L'].set_axis_off()

plt.show()
腳本的總執行時間: (0 分鐘 1.790 秒)